Create an impressive demo for your products
Share
Step 1: create business
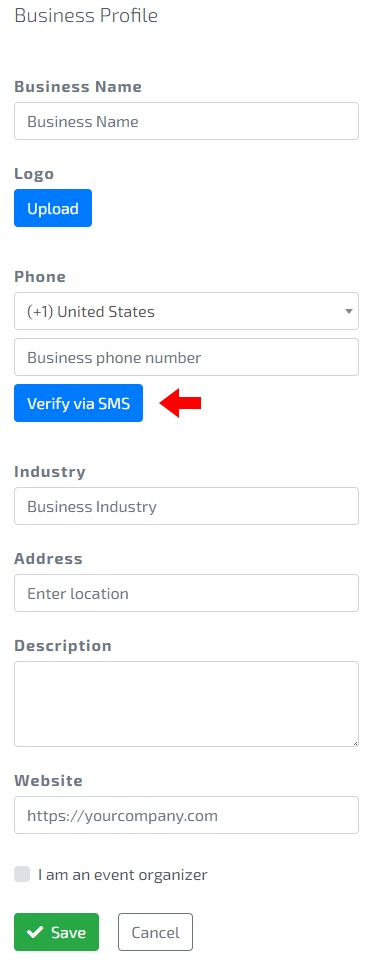
Use your browser to create a business. Log into your Linlet account and press “Create Business”.
Fill in the details and verify the company phone number through SMS.
Step 2: add products
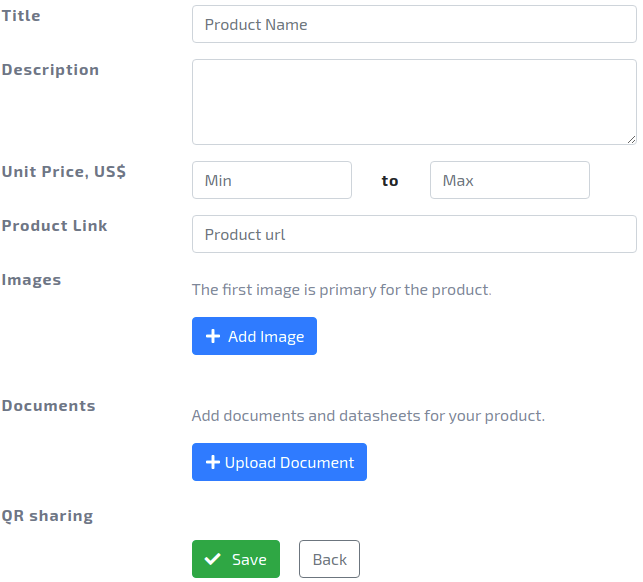
In your business menu, find Products and click “Add product”. Enter more details of the item to describe it:
- Keep Title and Description clear and straight to the point
- Add prices you offer per 1 unit from minimum to maximum for potential bulk orders
- Link to the product on your website
- Provide accurate Product images, the ones that utilize solid white background are recommended
- Documents field can be used to attach quality certificates if a product requires some
Once saved, the product will be visible on your company’s page.
Step 3: upload product catalogs
If you have a product catalog or brochure on hand, add it to the company documents. Customers can view the documents online without a need to download files or any special software. All catalogs will be accessible right on the company’s page.
You can find the documents in the business menu. Press “upload document” to add a catalog. Linlet accepts most common document formats.
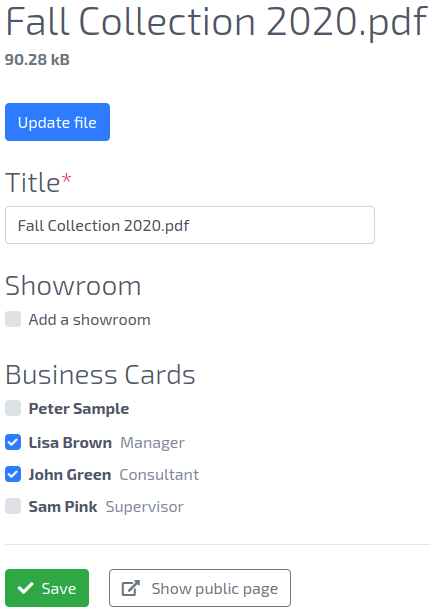
Step 4: add contacts
Attach one or multiple business cards to an uploaded document by clicking Edit.
Step 5: create a showroom
VR showroom is a scene in 3D that people can visit and interact with. It is a great way to display products and make product searching more interactive.
To create your first VR showroom on Linlet, you will need to upload a 3D Max scene or choose a default one.
- Find Showrooms tab in the Business menu and press “Create VR showroom”. Fill in the title and description.
- Press “Create 3D scene”. If you have some 3D Max files of a showroom or trade fair stand of your own, select “Upload” and choose the files. If you don’t, you can use one of the default scenes.
- Keep in mind to save your showroom.
Step 6: display products
In the Edit Scene mode select “Products” in the menu and choose a product from the list. Move a product around the scene to display it in a specific location.
Tip: You can rotate the whole scene to check how it looks and place products more accurately.
Add cameras in different areas of the room to create spots for previewing the products. Visitors will be able to switch between these cameras to look through the showroom.
Save your project and press “Render” to prepare the showroom.
Step 6: promotional materials
Attach catalogs and videos to your showroom. These attachments will be visible on a public page.
Additionally, you can insert videos and catalogs inside the showroom itself. Viewers can click on a catalog to check it out or play the video.
To add a video, press “Edit 3D Scene” and find an option you need in the left menu. Insert a video link and press “Add”, then choose a place in the scene to place it.
Document
To add a catalog, open your showroom page and add the document from your computer or company files. Then, you can also place a catalog into your Scene in the editing mode.
Keep in mind to save and render your showroom.
Step 7: find visitors
Open the showroom from the business section and press “Embed”. Simply copy and paste the code in full to your site. Now potential customers can check it out without leaving your website.
If you are using social media to promote your company or store, it is also possible to post products and showrooms there:
- Use “Share” to copy a direct link and publish the showroom on your socials.
- Open products and find the one you want to share. Click on its title and find “Share” button to post it outside Linlet.
Step 8: connect your offline catalogs
For each showroom, catalog, or product you can get a QR code on its page.This is a useful tool for offline marketing materials such as banners, brochures, catalogs, and other conventional media.
Don’t use QR codes in your online or digital marketing as it is usually inconvenient for people to scan it. Sharing a URL link is more convenient for online promotion channels.
To get a QR code, open your showroom’s page and navigate to QR Sharing. Use the QR code with “3D” in the title to share the virtual scene directly.
To get a QR code for a product, open the product you want to share and use QR Sharing provided.
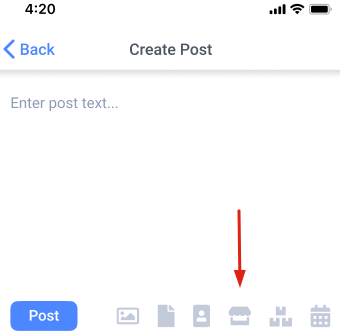
Step 9: post in your news feed
Share your showrooms, catalogs, and products in Linlet newsfeed for all the contacts to view. Type in your post and then press the attachment icon to add your company materials.