Create your first Virtual Event
Share
Step 1: create and verify company
Use the desktop version to create a business. Log into your Linlet account and press “Create Business”.
Fill in the details and verify the company phone number through SMS.
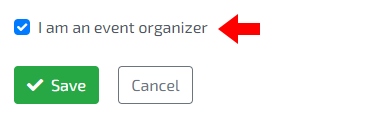
Put a checkmark near “I am an event organizer” option, so you can create events. Save your information.
Step 2: create a new event
In the Events tab press “Add event” to create one. It is a good idea to provide many details about your event, so visitors have full information.
Step 3: tell people more
In detailed description touch upon topics and details that can be interesting for potential attendees. Some examples include: event schedule, number of people and companies visiting, audience background, related event topics.
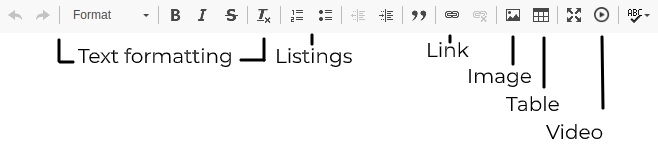
This not only informs attendees but also helps to make your event easier to be discovered. Use a Detailed Description field to add a special touch to an event’s page. This field allows you to change the layout of text through simple editing tools.
Step 4: choose additional settings
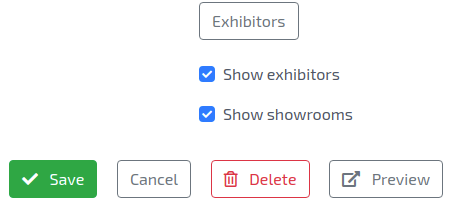
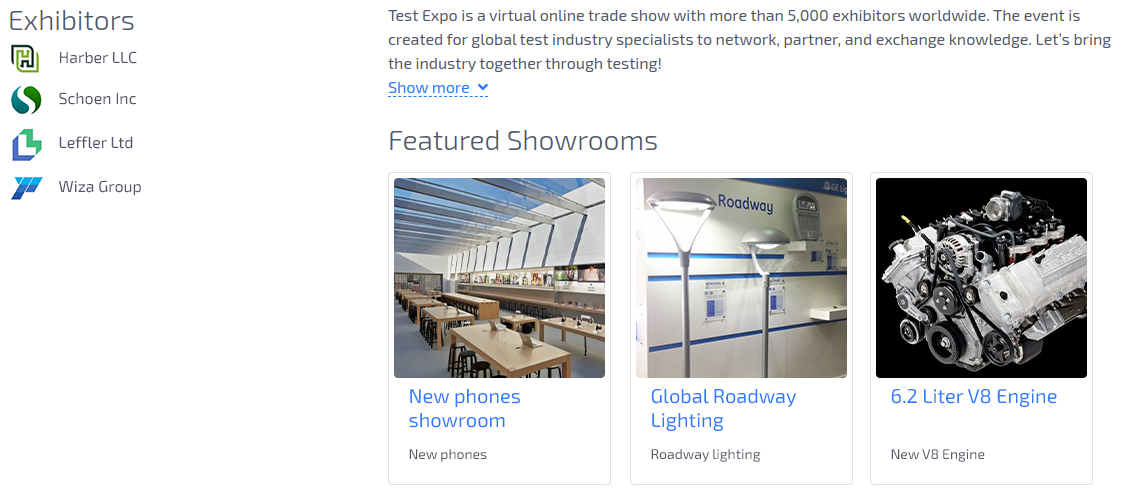
You can decide whether or not exhibitors list and showrooms will be shown on your event’s page.
- “Show exhibitors” option will add a list of exhibitors visible for everyone who accesses a page.
- “Show showrooms” will do the same for exhibitors showrooms.
In order for these lists to work, you need to ensure you invite and assign exhibitors as well as encourage them to submit showrooms:
Step 5: invite exhibitors
Open the Events tab again and use the “Exhibitors” button near your event. On this page, you can invite companies to join your event and exhibit their showrooms.

Navigate to this tab and press “Invite”. Then, type in the email address. If this user is registered on Linlet, we can add their company name, too. If they are not, you should type it in yourself. Add an invitation text and press “Submit” to finish and send the email.
Step 6: share your event
You can gather attendees through sharing an event via your social media. Open your event and press “Edit”. Then, scroll down and press “Share”. That way you can post an event on social media and messengers.

Step 7: add an event to your site
If you have a company website, you can embed an event directly there, so visitors can also join in. Like with sharing, you need to go to the edit mode. Then, use the “Embed” button to get the code. Then, сopy and paste the code in full to your website’s body. The embedded event tab on your site will be interactive and allow people to join or exhibit on your event right on the spot.
Step 8: incorporate offline marketing
From the editing mode on an event's page, you can get a QR code. Once scanned, it takes a person to the event's page. This is a useful tool for offline marketing materials such as banners, brochures, catalogs, and other conventional media.
Don’t use QR codes in your online or digital marketing as it is usually inconvenient for people to scan it. Sharing a URL link is more convenient for online promotion channels.
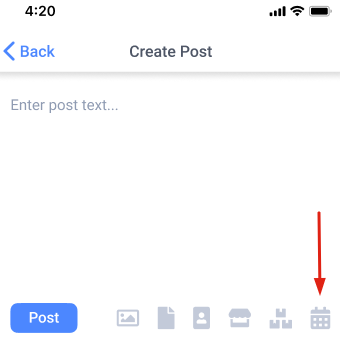
Step 9: share your event in a post
Post in your Linlet news feed to announce your event to all the contacts. To link an event to it, press the attachment icon on the posting window. Ensure you also provide some information to introduce readers to the topic. Once you post the update, all people you exchanged business cards with will see your post on their feeds.
Desktop

Mobile